 MixShot
How to take a screenshot on Windows
Windows has several built-in ways to capture the screen. Here they all are: which keys to press, where the image goes, and what to do when you need to mark something on it.
Updated November 18, 2026
Built-in keyboard shortcuts
| Keys | What it captures | Where the image goes |
|---|---|---|
| PrintScreen | The whole screen, or opens Snipping Tool, depending on Windows 11 settings | Clipboard |
| Alt+PrintScreen | The active window | Clipboard |
| Win+PrintScreen | The whole screen | Pictures\Screenshots folder |
| Win+Shift+S | An area, a window or the screen | Clipboard and a Snipping Tool notification |
Paste a clipboard image with Ctrl+V into a chat, an email, Word or Paint.
How to capture part of the screen
- Press Win+Shift+S. The screen dims.
- Choose Rectangle mode at the top.
- Select the area with the mouse.
- Paste with Ctrl+V, or click the notification to open the image in Snipping Tool.
When the built-in tools aren't enough
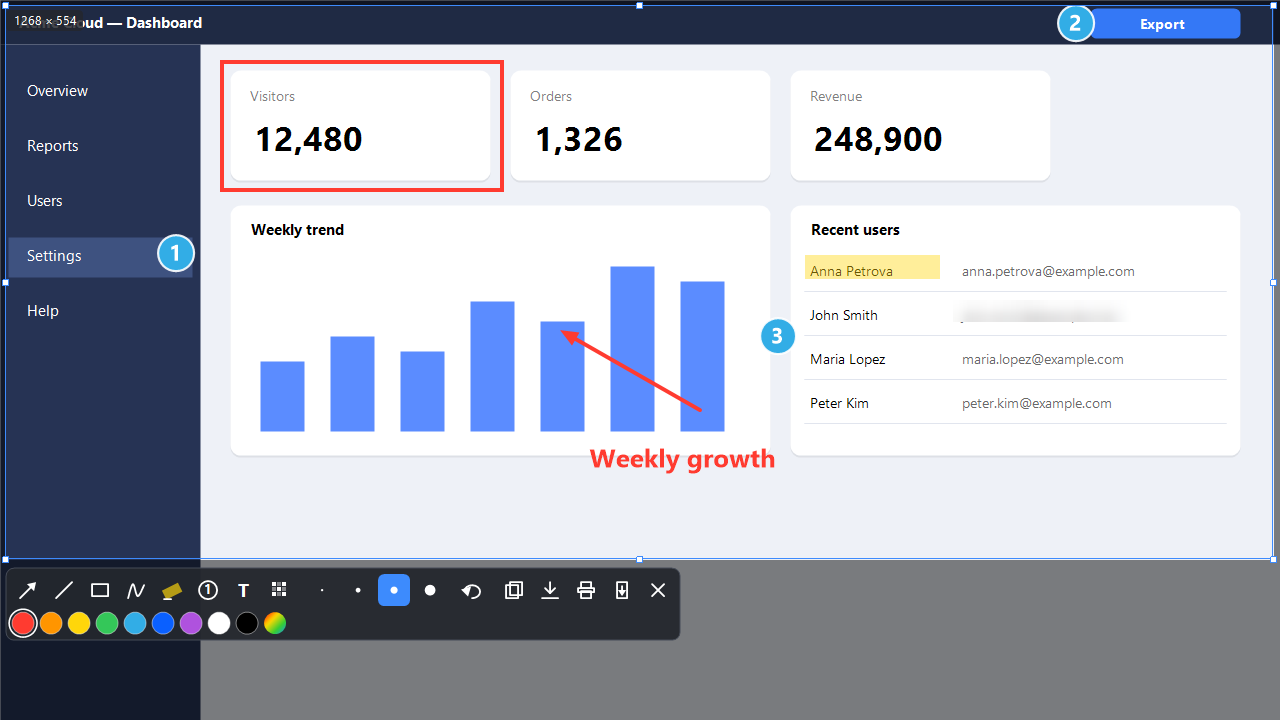
The built-in tools capture the screen, but you can't mark it up on the spot: the image opens in a separate window first. If you often show things to colleagues or write guides, it's faster to draw at the moment of capture.
That's how MixShot works. Press PrintScreen, select an area, and the toolbar appears right under the frame:
- Point with an arrow and mark the order of actions with circles 1, 2, 3.
- Cover a password or a name with blur.
- Ctrl+C copies the result, Ctrl+S saves a PNG.
If PrintScreen doesn't work
- On laptops the key often needs Fn.
- On Windows 11 the key may open Snipping Tool. You can change this in Settings, Accessibility, Keyboard.
- Another program, such as a cloud drive, may be holding the key. Check its settings.